Nov 7, 2017
This article was originally posted on medium.
VS Code is a great editor platform. I tried my hand at creating an extension and although the documentation is fairly complete and thorough. I still ran into some issues. I’m documenting them here for other extension authors.
VS Code functionality takes the form of commands in the command palette.
Promises
If you’re used to the ES6 Promise style then VS Code’s promise style may
throw you off. Here is the newer style way to handle errors in promises
by chaining a catch method after a then method:
// ES6 PromisedoPromise().then(val => { handleValue(val)}).catch(err => { handleError(err)})
VS Code’s Thenable style promise then method takes two params.
- Success handler
- Error handler
// Thenable style promisesdoPromise().then( val => { handleValue(val) }, err => { handleError(err) })
Make sure to handle these errors correctly or you’re going to have a bad time.
Settings
It wasn’t immediately clear how to add settings to my extension. Turns out, I was looking for the wrong word. Settings are actually call configurations and are located within contributions. Here is a direct link to the documentation.
To add a setting to your extension, you need to add a key to your extension’s package.json file.
"contributes": { "configuration": ...}
This configuration section takes a JSON schema that describes what your setting should be. Basically what data type it takes, a default value and a description.
It also wasn’t immediately clear how to implement a setting that takes an array of objects. You need to utilize the items key to describe nested values. Here is an example from my extension VSNotes:
Activation Events
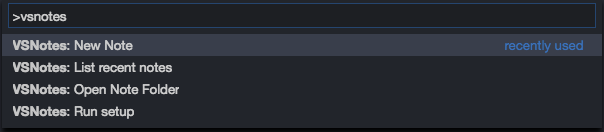
If you have multiple commands you will need to make sure to include them in the activationEvents portion of your package.json. This tells vscode to execute the activate function in extension.js.
For example:
"activationEvents": [ "onCommand:extension.newNote", "onCommand:extension.listNotes", "onCommand:extension.setupNotes", "onCommand:extension.openNoteFolder"],"commands": [ { "command": "extension.newNote", "title": "VSNotes: New Note" }, { "command": "extension.listNotes", "title": "VSNotes: List recent notes" }, { "command": "extension.setupNotes", "title": "VSNotes: Run setup" }, { "command": "extension.openNoteFolder", "title": "VSNotes: Open Note Folder" }],
It may not be necessary to put all your commands into the activation event depending on how you architect your application. This could be a potential issue if commands fail to show up.
Complex commands
I have no idea what most of these do or why they are separate from the regular API. Could be because they are helper functions? Anyways, I used one to open a folder vscode.openFolder and it took a bit of time to figure out how to actually open a folder. If some functionality you need isn’t in the regular namespace API check the complex commands first.
Conclusion
Overall it was really painless to write a VS Code extension. The Yeoman scaffolding they provide really speeds up development time and makes the whole process much easier. Publishing is well documented and easy with the provided CLI tool. Overall a pleasant experience.
Check out the extension I wrote: VSNotes. It’s a quick way to set a note folder and create markdown notes right from VS Code. It’s quick and painless and lets you leverage VS Code’s extensions for your note taking workflow. Grab it from the marketplace.